
- Brain Damaged Lockouts -- A Little Bit of Theory
- Hacking the BIOS? Buy It Optional Service
- PCI: Proof of Concept Initialization
- Extrapolating
- IDSEL Part 1: It's Disabled; Selection Emerges Later
- IDSEL Part 2: I Defeated System-Enforced Lockouts
- Future plans
- DIY: Don't It Yourself
- Photos
- Other Implementations
Chris Lu and I originally wrote -- and did -- this around December, 2005. The article has been preserved for posterity. New since then is Tiido Priimägi's version of this hack, which takes it to another level; see below!
As the authors of this article discovered unintentionally, recent HP laptops (including the HP tc1100 tablet PC and the HP zv5460us desktop replacement) have a wireless whitelist built into the BIOS similar to that found by Matthew Garrett on IBM Thinkpads. In an attempt to replace the built in Broadcom wireless card in Chris' laptop with an Atheros card, we came across this evil firmware hack on our own. In this paper, we will detail the method that we used to defeat this lockout.
Brain Damaged Lockouts -- A Little Bit of Theory
When the PC was first designed, it was designed on the premise of expandibility. Architectures were standardized for the express purpose of creating a platform that anybody (well, anybody with the time and money to do so) could build on top of. As time went on, the platform became more versatile -- computational power increased, electrical power consumption decreased, size decreased, and expansions that nobody would've even conceived of sprang into existance. The computer market thrived on competition between multiple manufacturers who wanted to provide an expansion that did the same thing.
But over time, computers tended towards becoming more integrated machines -- black boxes, if you will. Consumers began looking for one box that they could buy that did everything that they needed. With this trend, manufacturers began shipping inferior parts with computers because they could get away with it. Sure, the user could go out later and buy a more powerful replacement, but they had still given their money to the original manufacturer for the less powerful part. The industry continued to thrive, offering upgrades for users who wanted them.
Recently, though, manufacturers have started down a worryingly slippery slope. Parts that have otherwise been commodities -- in particular, wireless cards -- have been arbitrarly decided to be "incompatible" with machines that they would otherwise be electrically and computationally compatible with. We found that out the hard way when Chris bought a more powerful wireless card for his laptop. He eagerly installed it in his system, but when he powered the system on, he was greeted with an error: "104 - Unsupported wireless device. System halted."
The system powered up, and found that a wireless card existed. However, it determined that it was not a wireless card that was "approved" by the system, and hence refused to allow access to any part of the system until the "unapproved" device was removed. We saw this as an affront to the history on which these computers were developed, and began searching for a way to circumvent this restriction.
Hacking the BIOS? Buy It Optional Service
The card that we wished to insert into this system was an Atheros-based wireless card that did not have the appropriate bits set to have the HP BIOS recognize it. In the past, we tried modifying the BIOS as mentioned on Garrett's site, however our success was limited. We managed to complete all steps from 1 to 5; however the latter part of the 6th step unfortunately applied. (To quote: "your laptop is probably dead".) After the BIOS reflash, the system refused to power up, instead spinning all of its fans at full throttle. When the system was returned from service, we decided not to attempt that modification again, and try for other routes. However, while the system was in service, we decided to think up other methods to defeat the lockout.
PCI: Proof of Concept Initialization
In the days after sending in the the zv5460us for repair, the authors tried out other methods on Joshua's HP tc1100, which suffers from the same whitelist lockout. We had read elsewhere that other people had success with suspending the system before the kernel boots, inserting the wireless card, and resuming the system and allowing the kernel to boot. The tc1100 cannot suspend without help from an operating system - it especially cannot suspend when at the GRUB menu. However, luckily for us, the tc1100 has some level of suspend and resume support under Linux, as long as no graphics drivers are loaded.
We booted the tc1100 into a single user mode and forced the system into a "suspend-to-RAM" state. Since power was removed from the PCI bus, we were able to successfully insert the card into the tc1100 without causing the system to release smoke. When we resumed the system, there were no BIOS errors, but the card was not recognized. We used an application called "kexec" to boot a new instance of Linux without going through the BIOS. When the new instance reprobed for PCI devices, it successfully found the card on the bus, and loaded the drivers.
Obviously, this is too unwieldy for daily use. Although the card functions in the end, the system must be disassembled at every boot. However, we had successfully completed an initial proof of concept - PCI can be initialized without help from the BIOS.
Extrapolating
When the zv5460us came back, one question that came up was whether we could hotplug the mini-PCI board to avoid the BIOS seeing it. We decided that this would be too risky. In addition to putting the bus in an inconsistent state for a few milliseconds, we also determined that we'd run the risk of applying signal voltage before applying power, and hence putting the chip into a latchup state and destroying the board. We decided that this risk was unacceptable - after all, the goal is to make the board work, not to destroy the board.
While continuing to think of ways to have the board disappear during the BIOS board detect process, Joshua drew on prior knowledge of the PCI bus to think of disabling the board's configuration selection enable pin (IDSEL) while the BIOS was probing. This would prevent the BIOS from detecting the card and complaining.
For those of you unfamiliar with the internals of the PCI bus, on boot, the system needs to scan all of the slots on the system for cards before it can assign them "addresses" to be called on. On the PCI bus, all of the signals are shared with the exception of the pin that requests a card to identify itself at system boot time. (This pin is called "IDSEL".) So, on boot, the system "asks" each card in the system what it is by raising the IDSEL signal on each pin and sending a brief sequence of commands. The system then parses the results, assigns resources to the cards if necessary, and possibly complains that you are using a disallowed card. However, if a slot does not respond (usually because there is no card in that slot), the system does not bother to interrogate further -- it just moves on. This scanning process is what we needed to defeat -- we wanted to cause the BIOS to move on instead of recognizing that our (unauthorized) Atheros PCI card is in the system.
IDSEL Part 1: It's Disabled; Selection Emerges Later
After some time on Google, we determined that the Mini-PCI card that we're looking at is "type III". After a little more time, we found the pinouts for these sorts of card. Looking down on the left side of the chart, we see that IDSEL is pin 48. However, this is entirely useless without knowing how the pin numbers are assigned.
We first tried linearly going from left to right on the component side of the board (i.e., the side of the board facing up in the system). We painstakingly counted out 48 pins, placed some Scotch tape over the offending pin, and used an Exacto knife to remove the excess. We placed the freshly-modified wireless card in the system and powered up. The system booted, but when we used the "lspci" command to see what cards were in the system, a card that was not our wireless card and was not anything else that the system knew about appeared. The identification bits appeared to be similar to the wireless card's, but one particular bit was cleared. Evidently the pin that we masked was a pin that carried data, not the IDSEL pin that we were looking for.
We also tried a few other permutations, including starting on the bottom, starting on the right top, and starting on the right bottom. Unfortunately, none of those worked. Just as we were about to give up, we got one more idea -- and we had a way to test it.
One of the signatures that we could use to determine whether we had the pins correct on the card without masking a pin and inserting into the system was the pattern of grounds. We could do a continuity check between the metal shield on the card and the pins that we believe to be ground on the card, and get an audible indication as to whether our hypothesis was correct. We briefly tested this by running through the pin orders that we knew to be incorrect, and sure enough, the grounds were not where we expected them.
At that point, we found some information on the web that led us to believe that the pins alternated on the card edge header - for example, pin 1 is on the left side of the component side; pin 2 is immediately under pin 1; pin 3 is to the right of pin 1; pin 4 is immediatly under pin 3; and so on. We decided to test this one more pattern before looking for a new pin-out. It turned out, in fact, that the grounds were in the right place using that method.
We cut out a piece of tape to cover pin 48 with (which we found to be immediately to the left of two grounds on top of each other, making it very easy to recognize), and inserted it into Chris' system. Much to our surprise, the system successfully booted, and the card was not detected by Linux -- exactly in line with our expectations for a disabled IDSEL pin.
IDSEL Part 2: I Defeated System-Enforced Lockouts
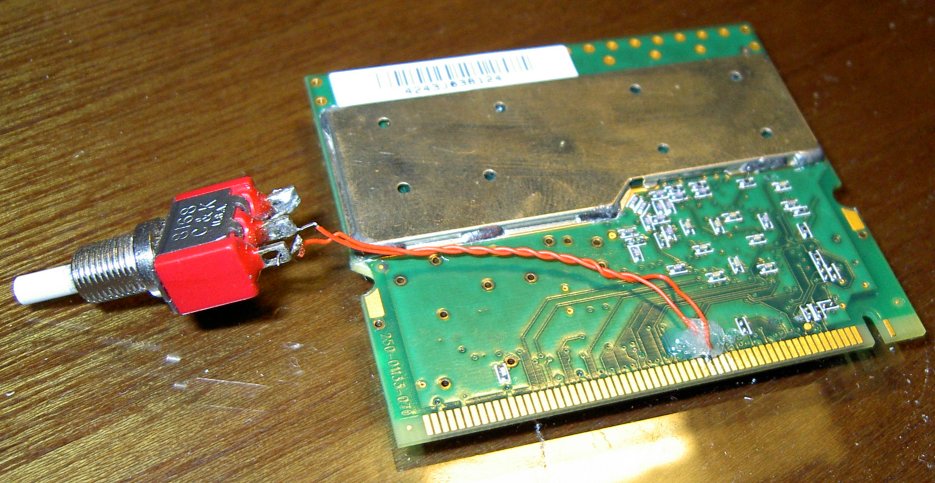
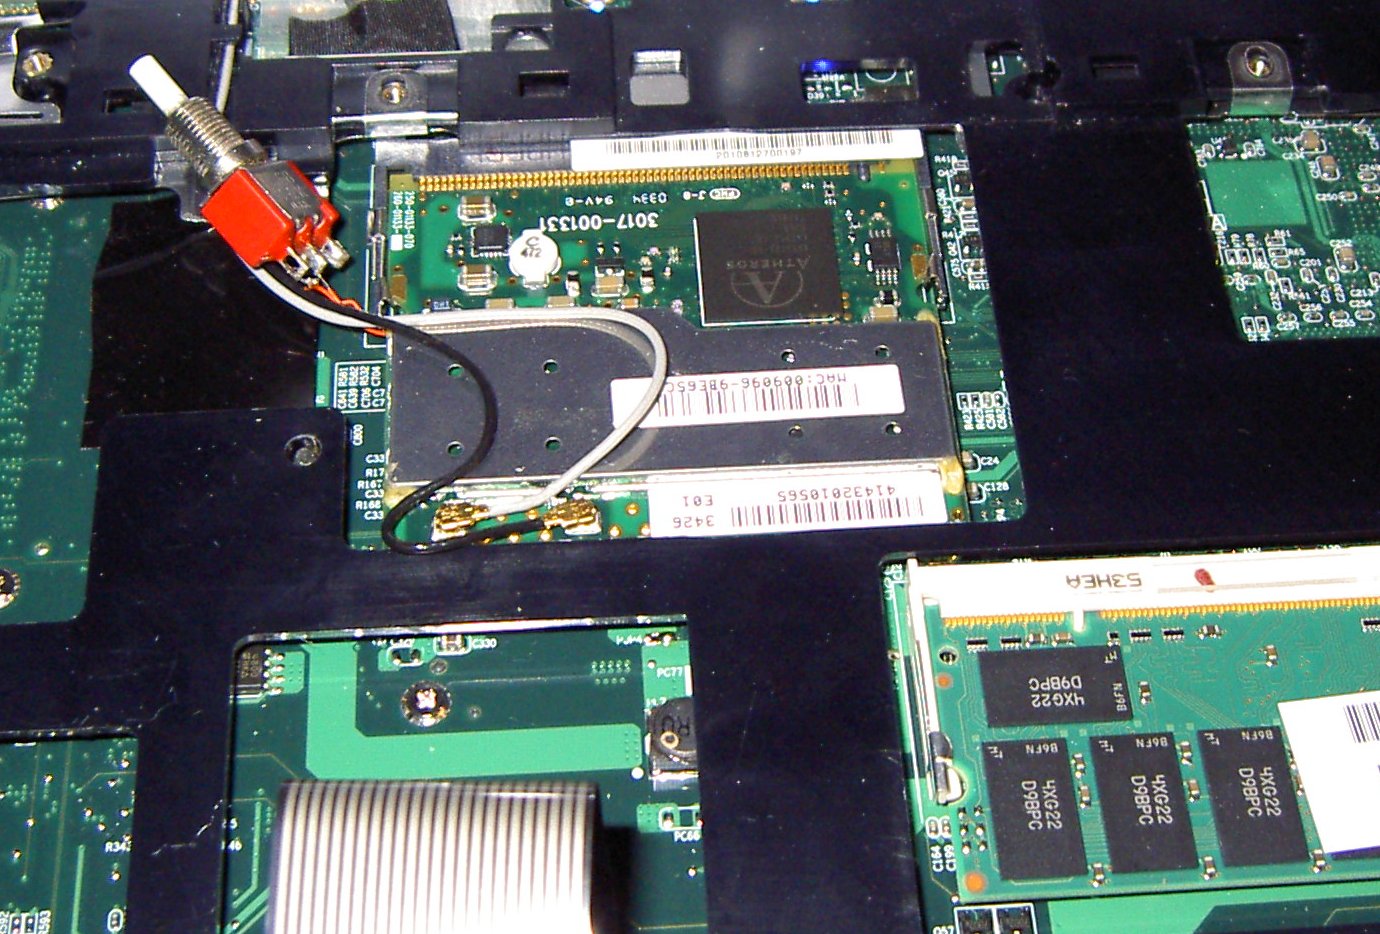
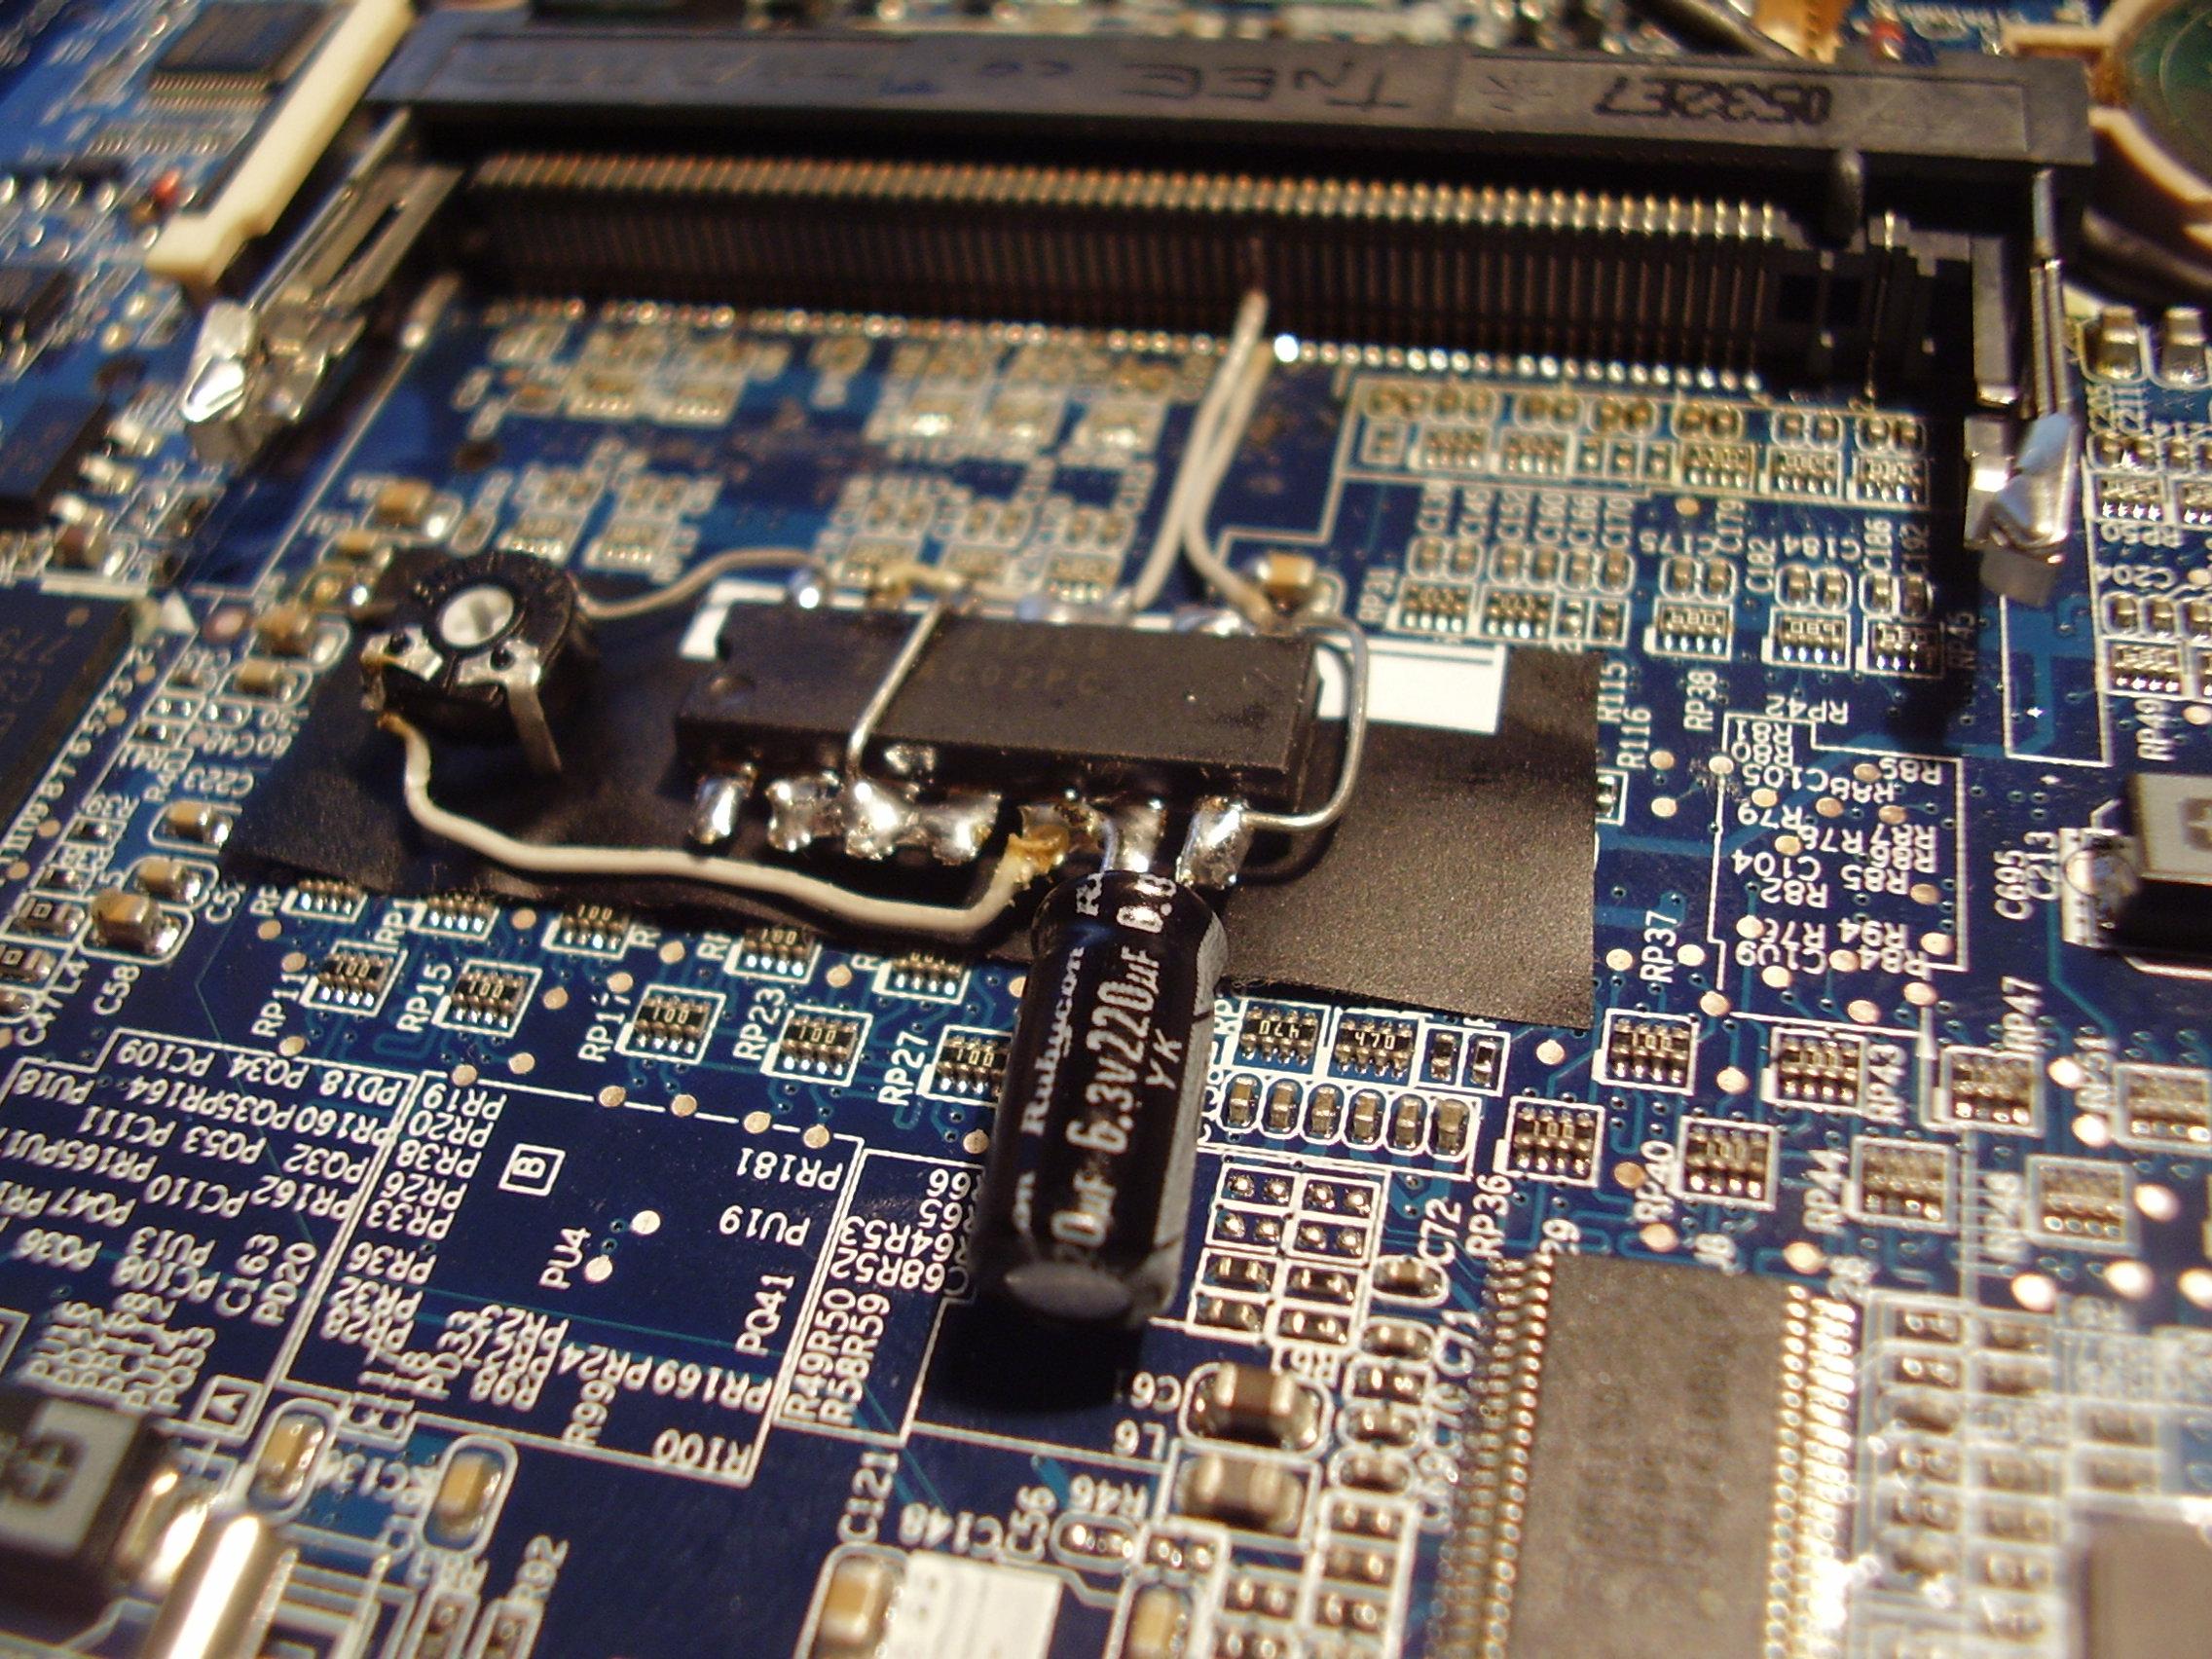
Now that we have successfully disabled IDSEL temporarily, we need to be able to control it so that it's enabled when Linux wants to see it. The plan of attack in this case will be to cut the IDSEL trace on the Mini-PCI board, and to install a normally-closed switch in its place.
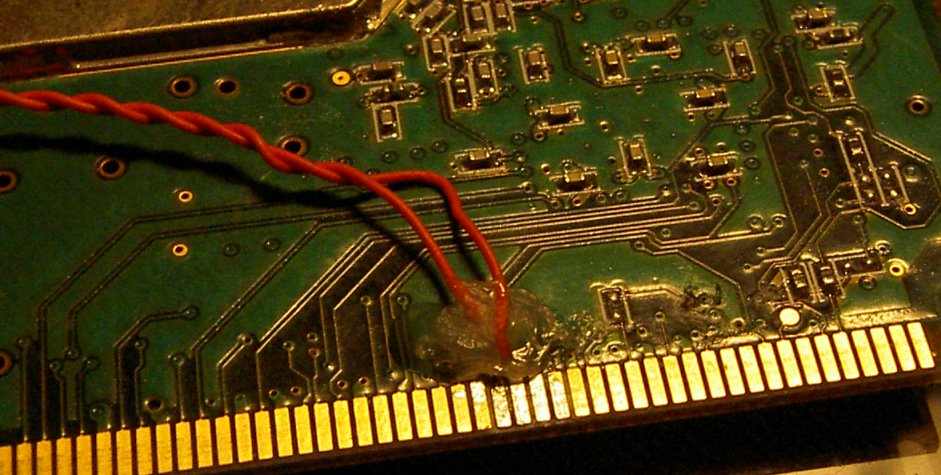
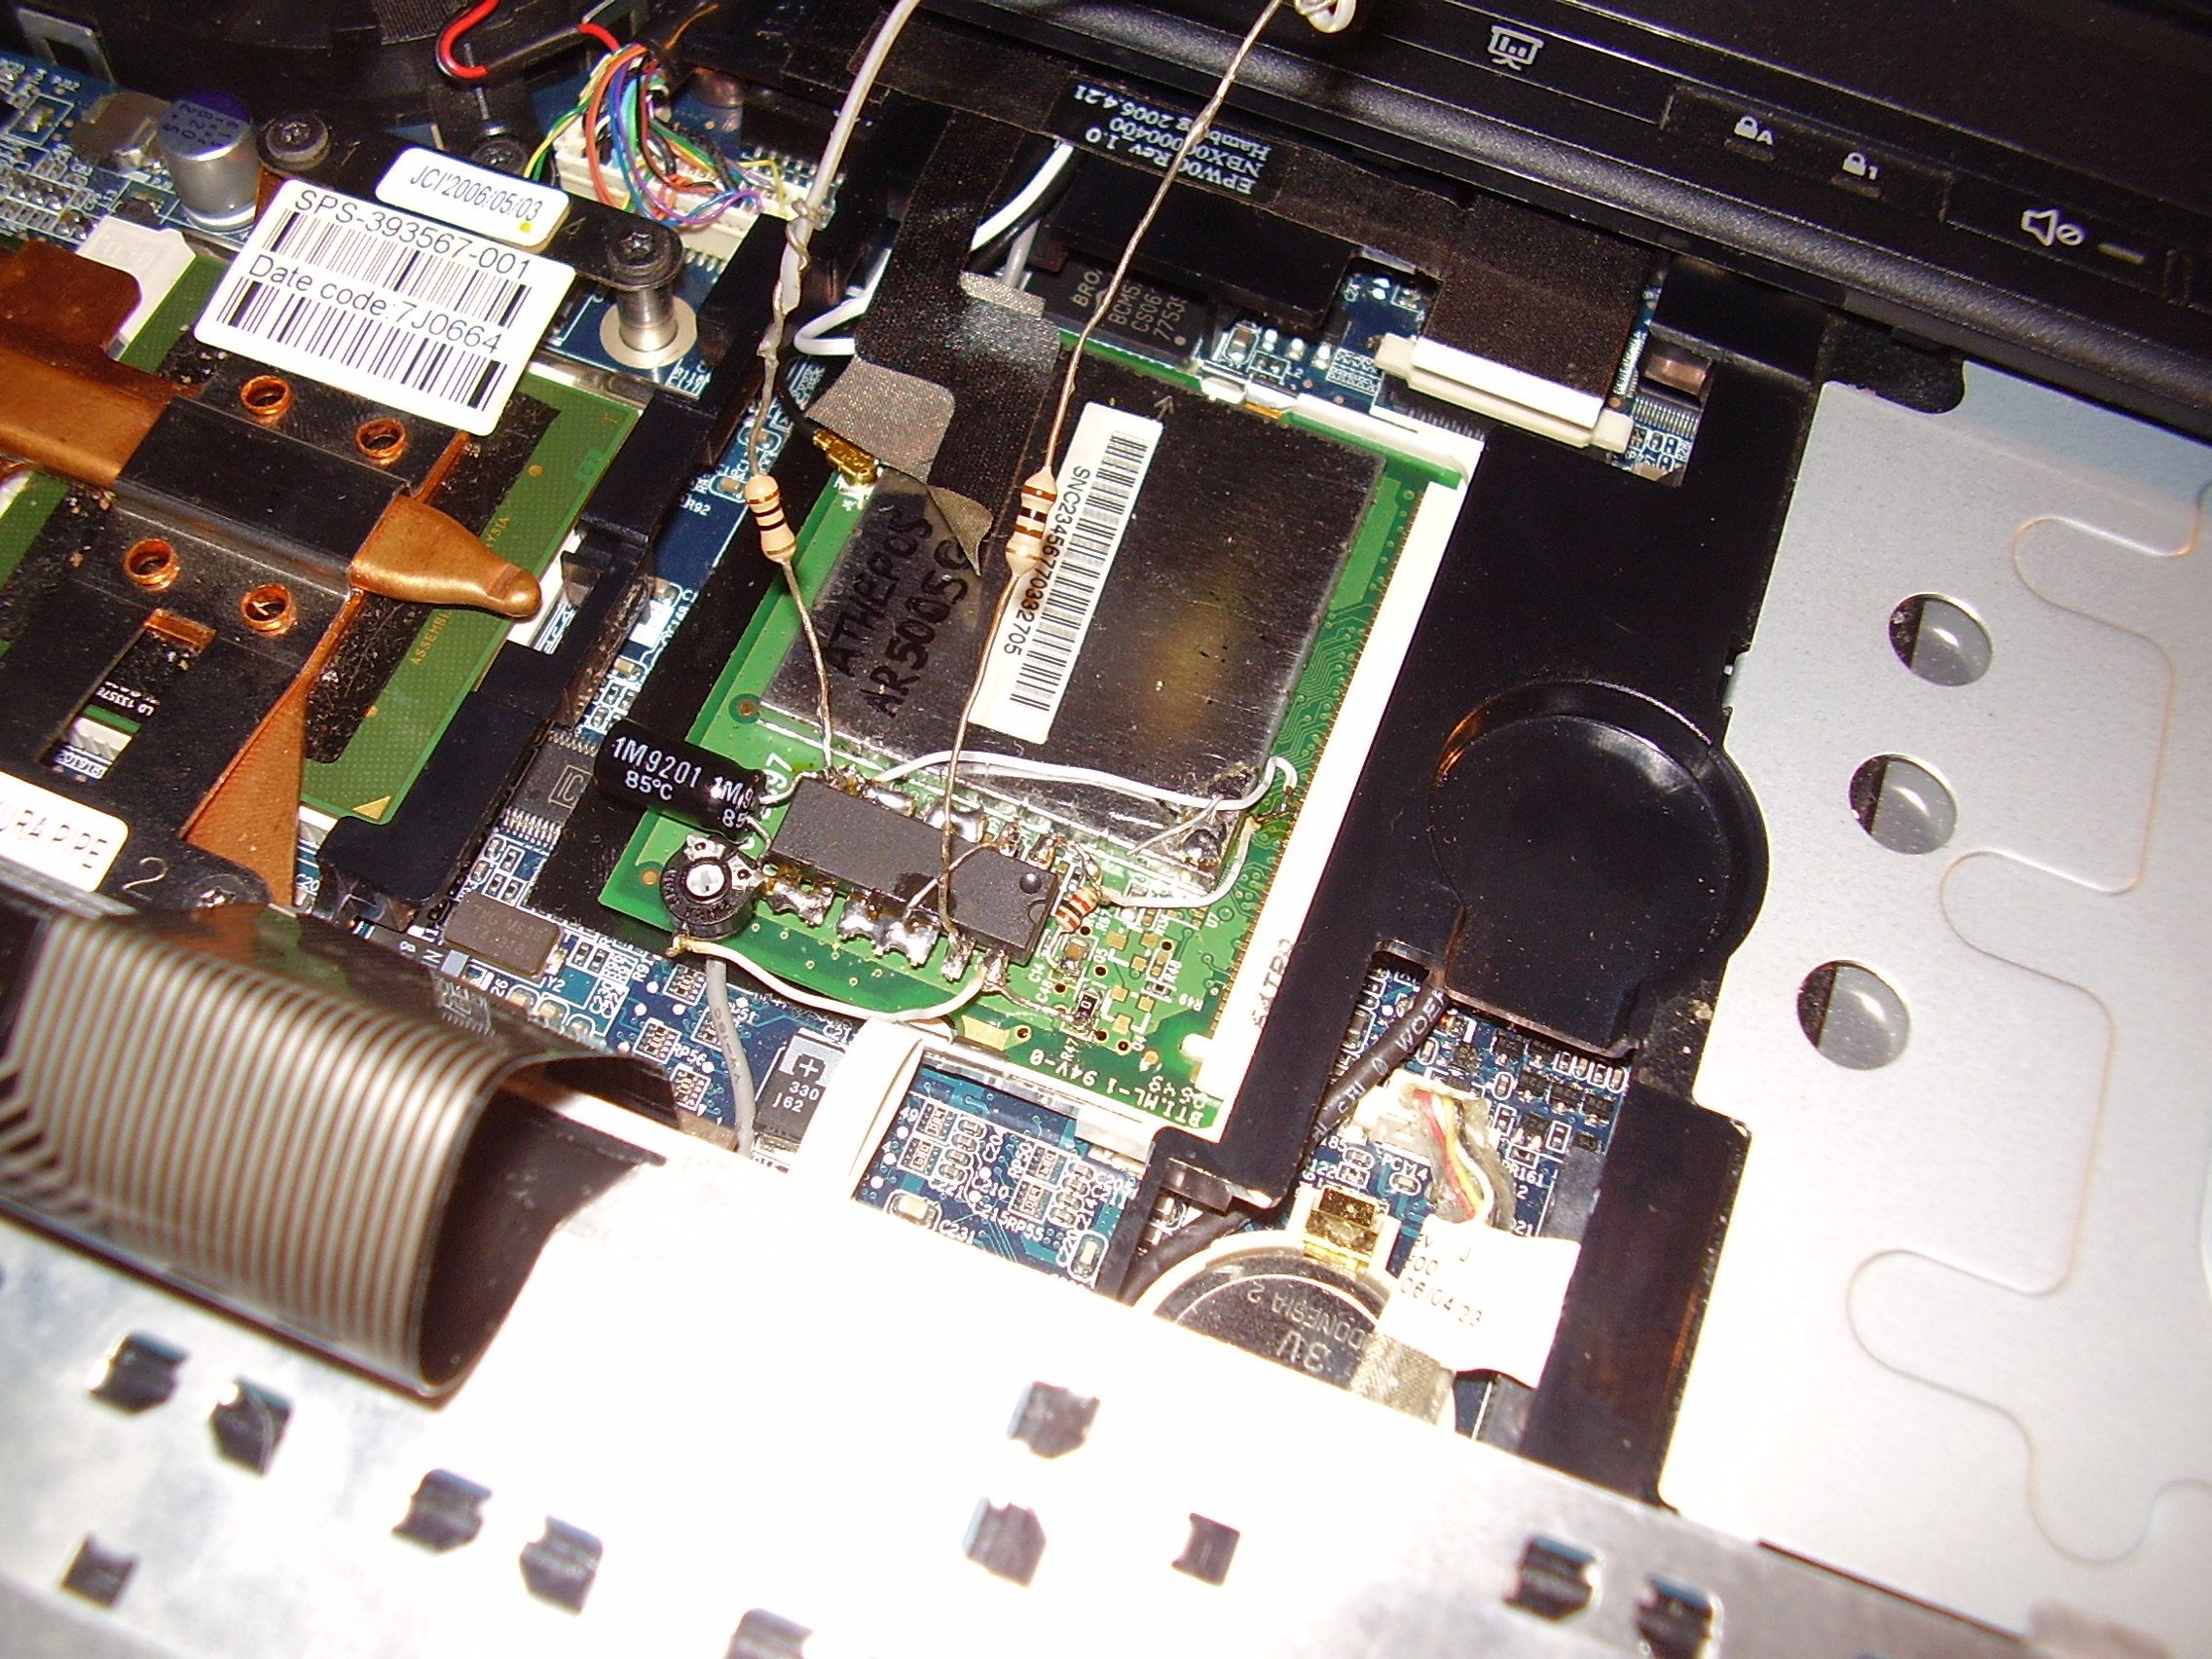
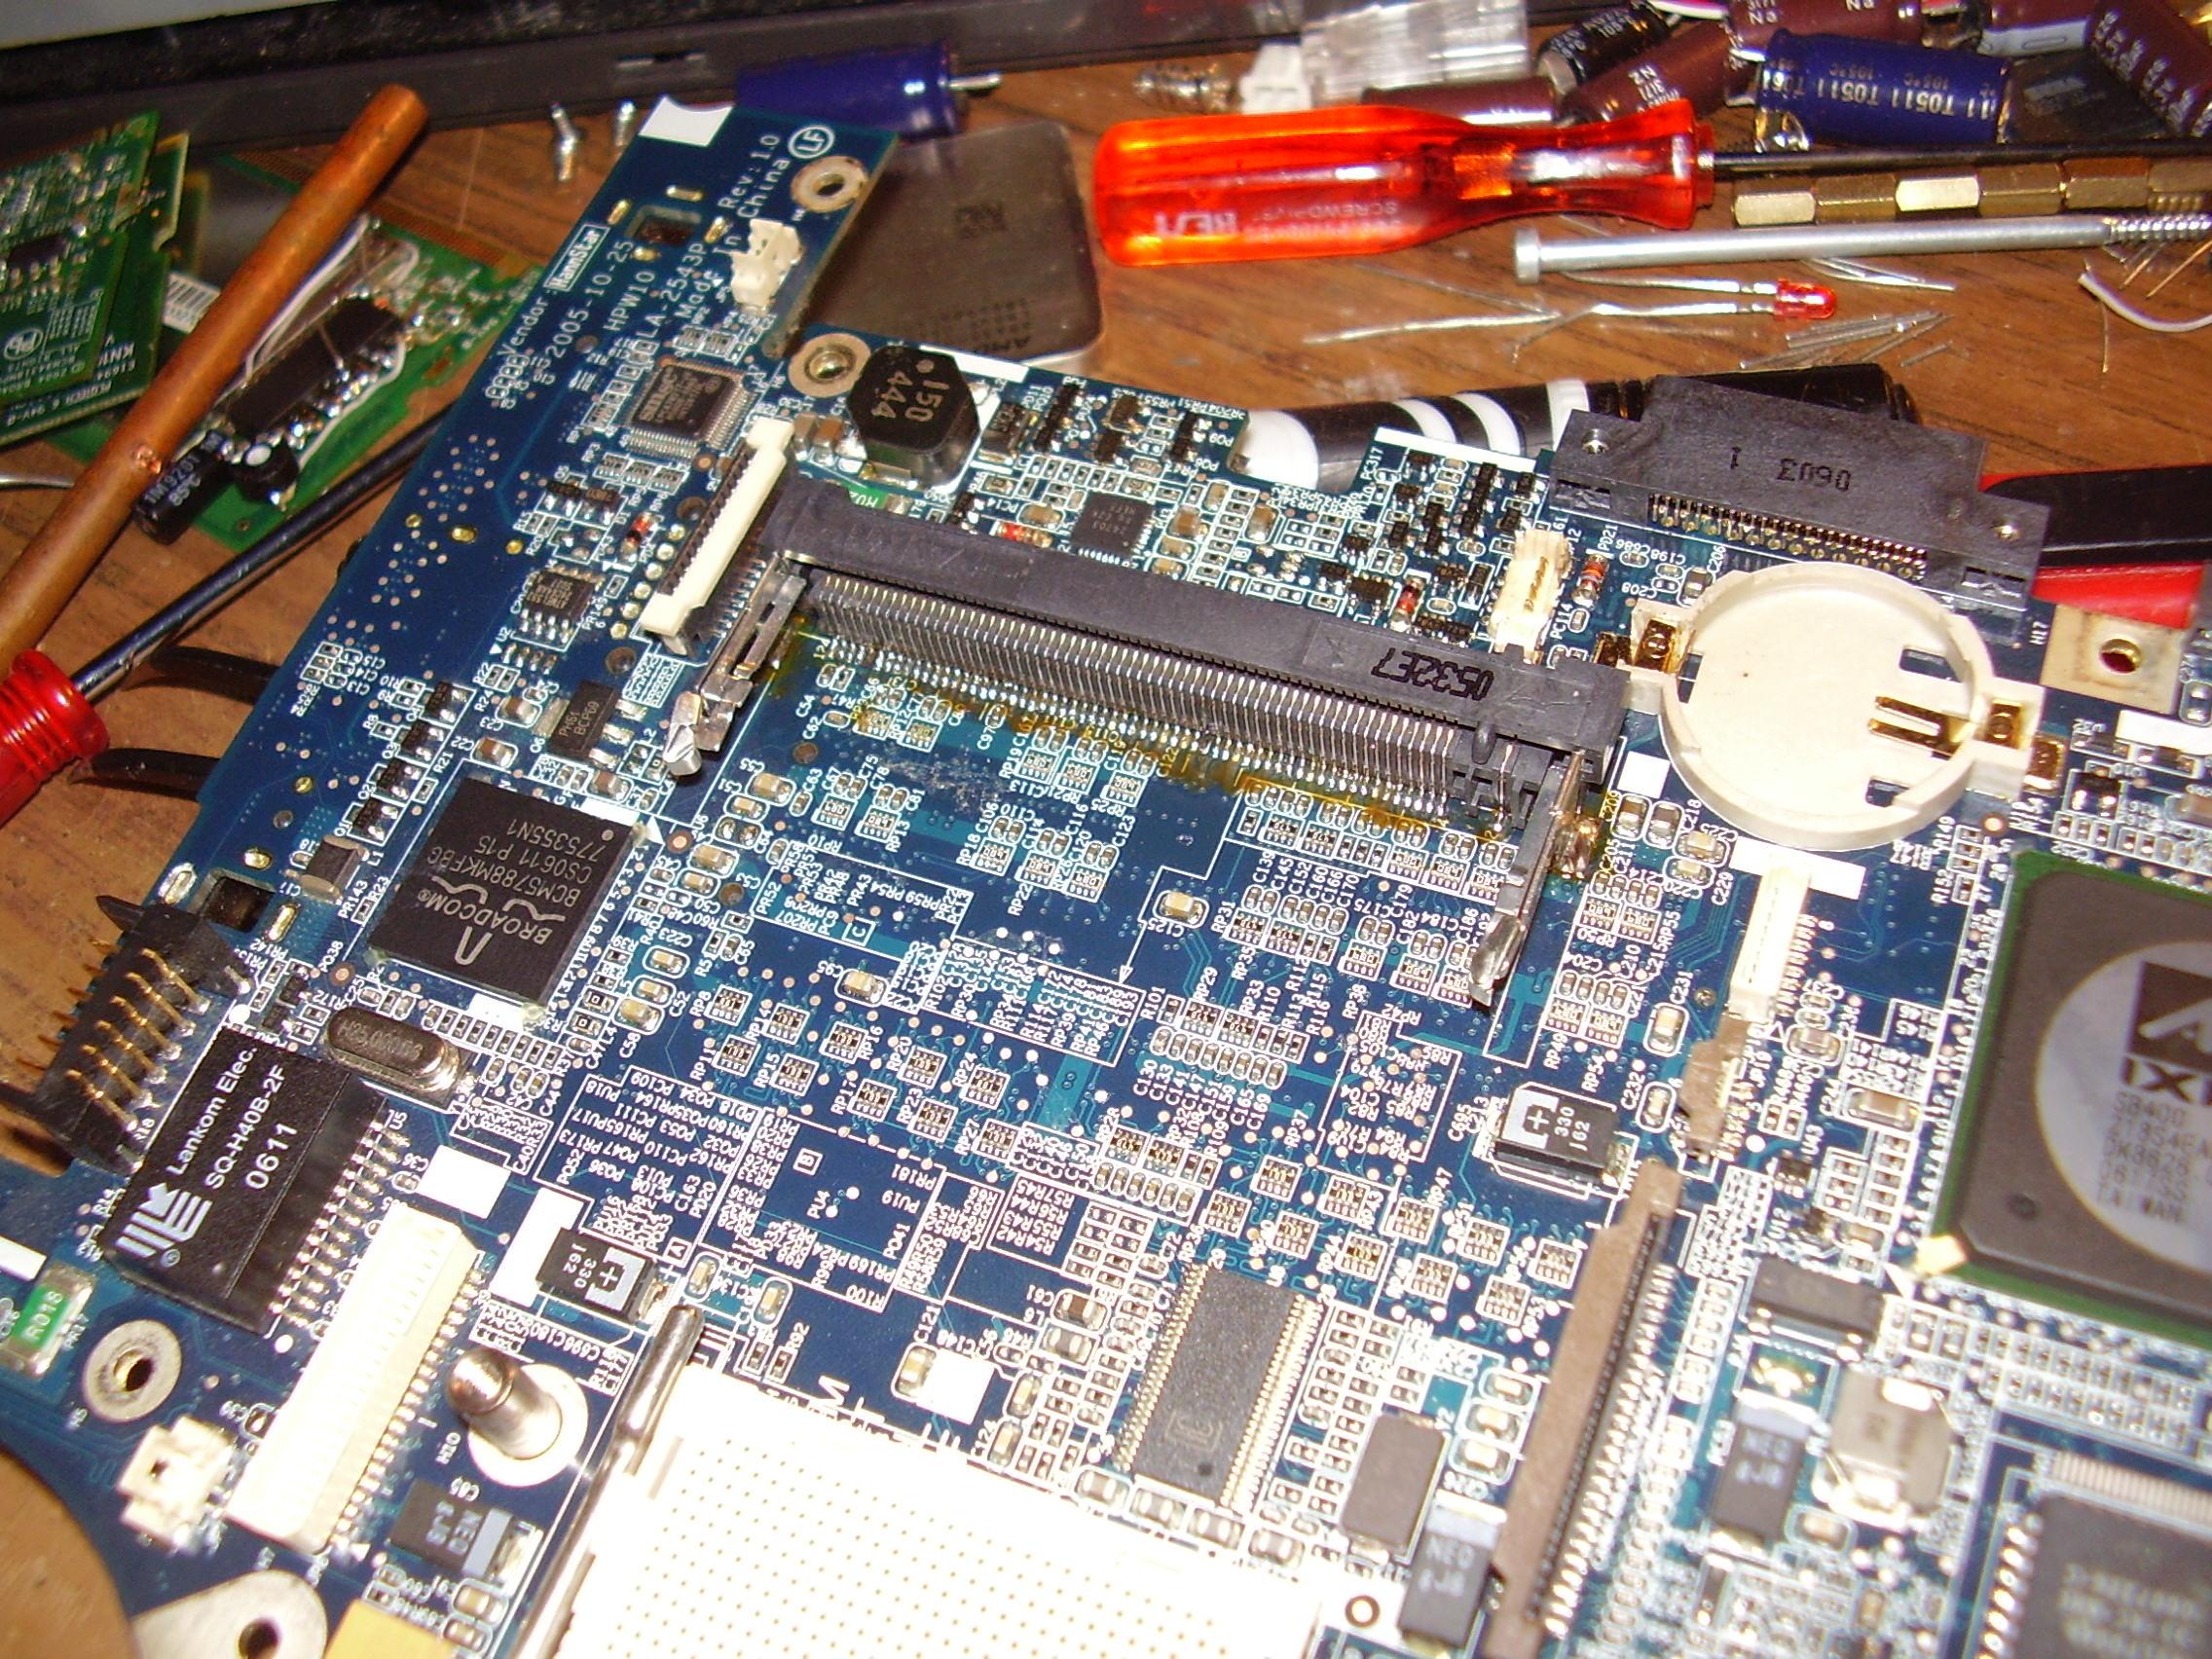
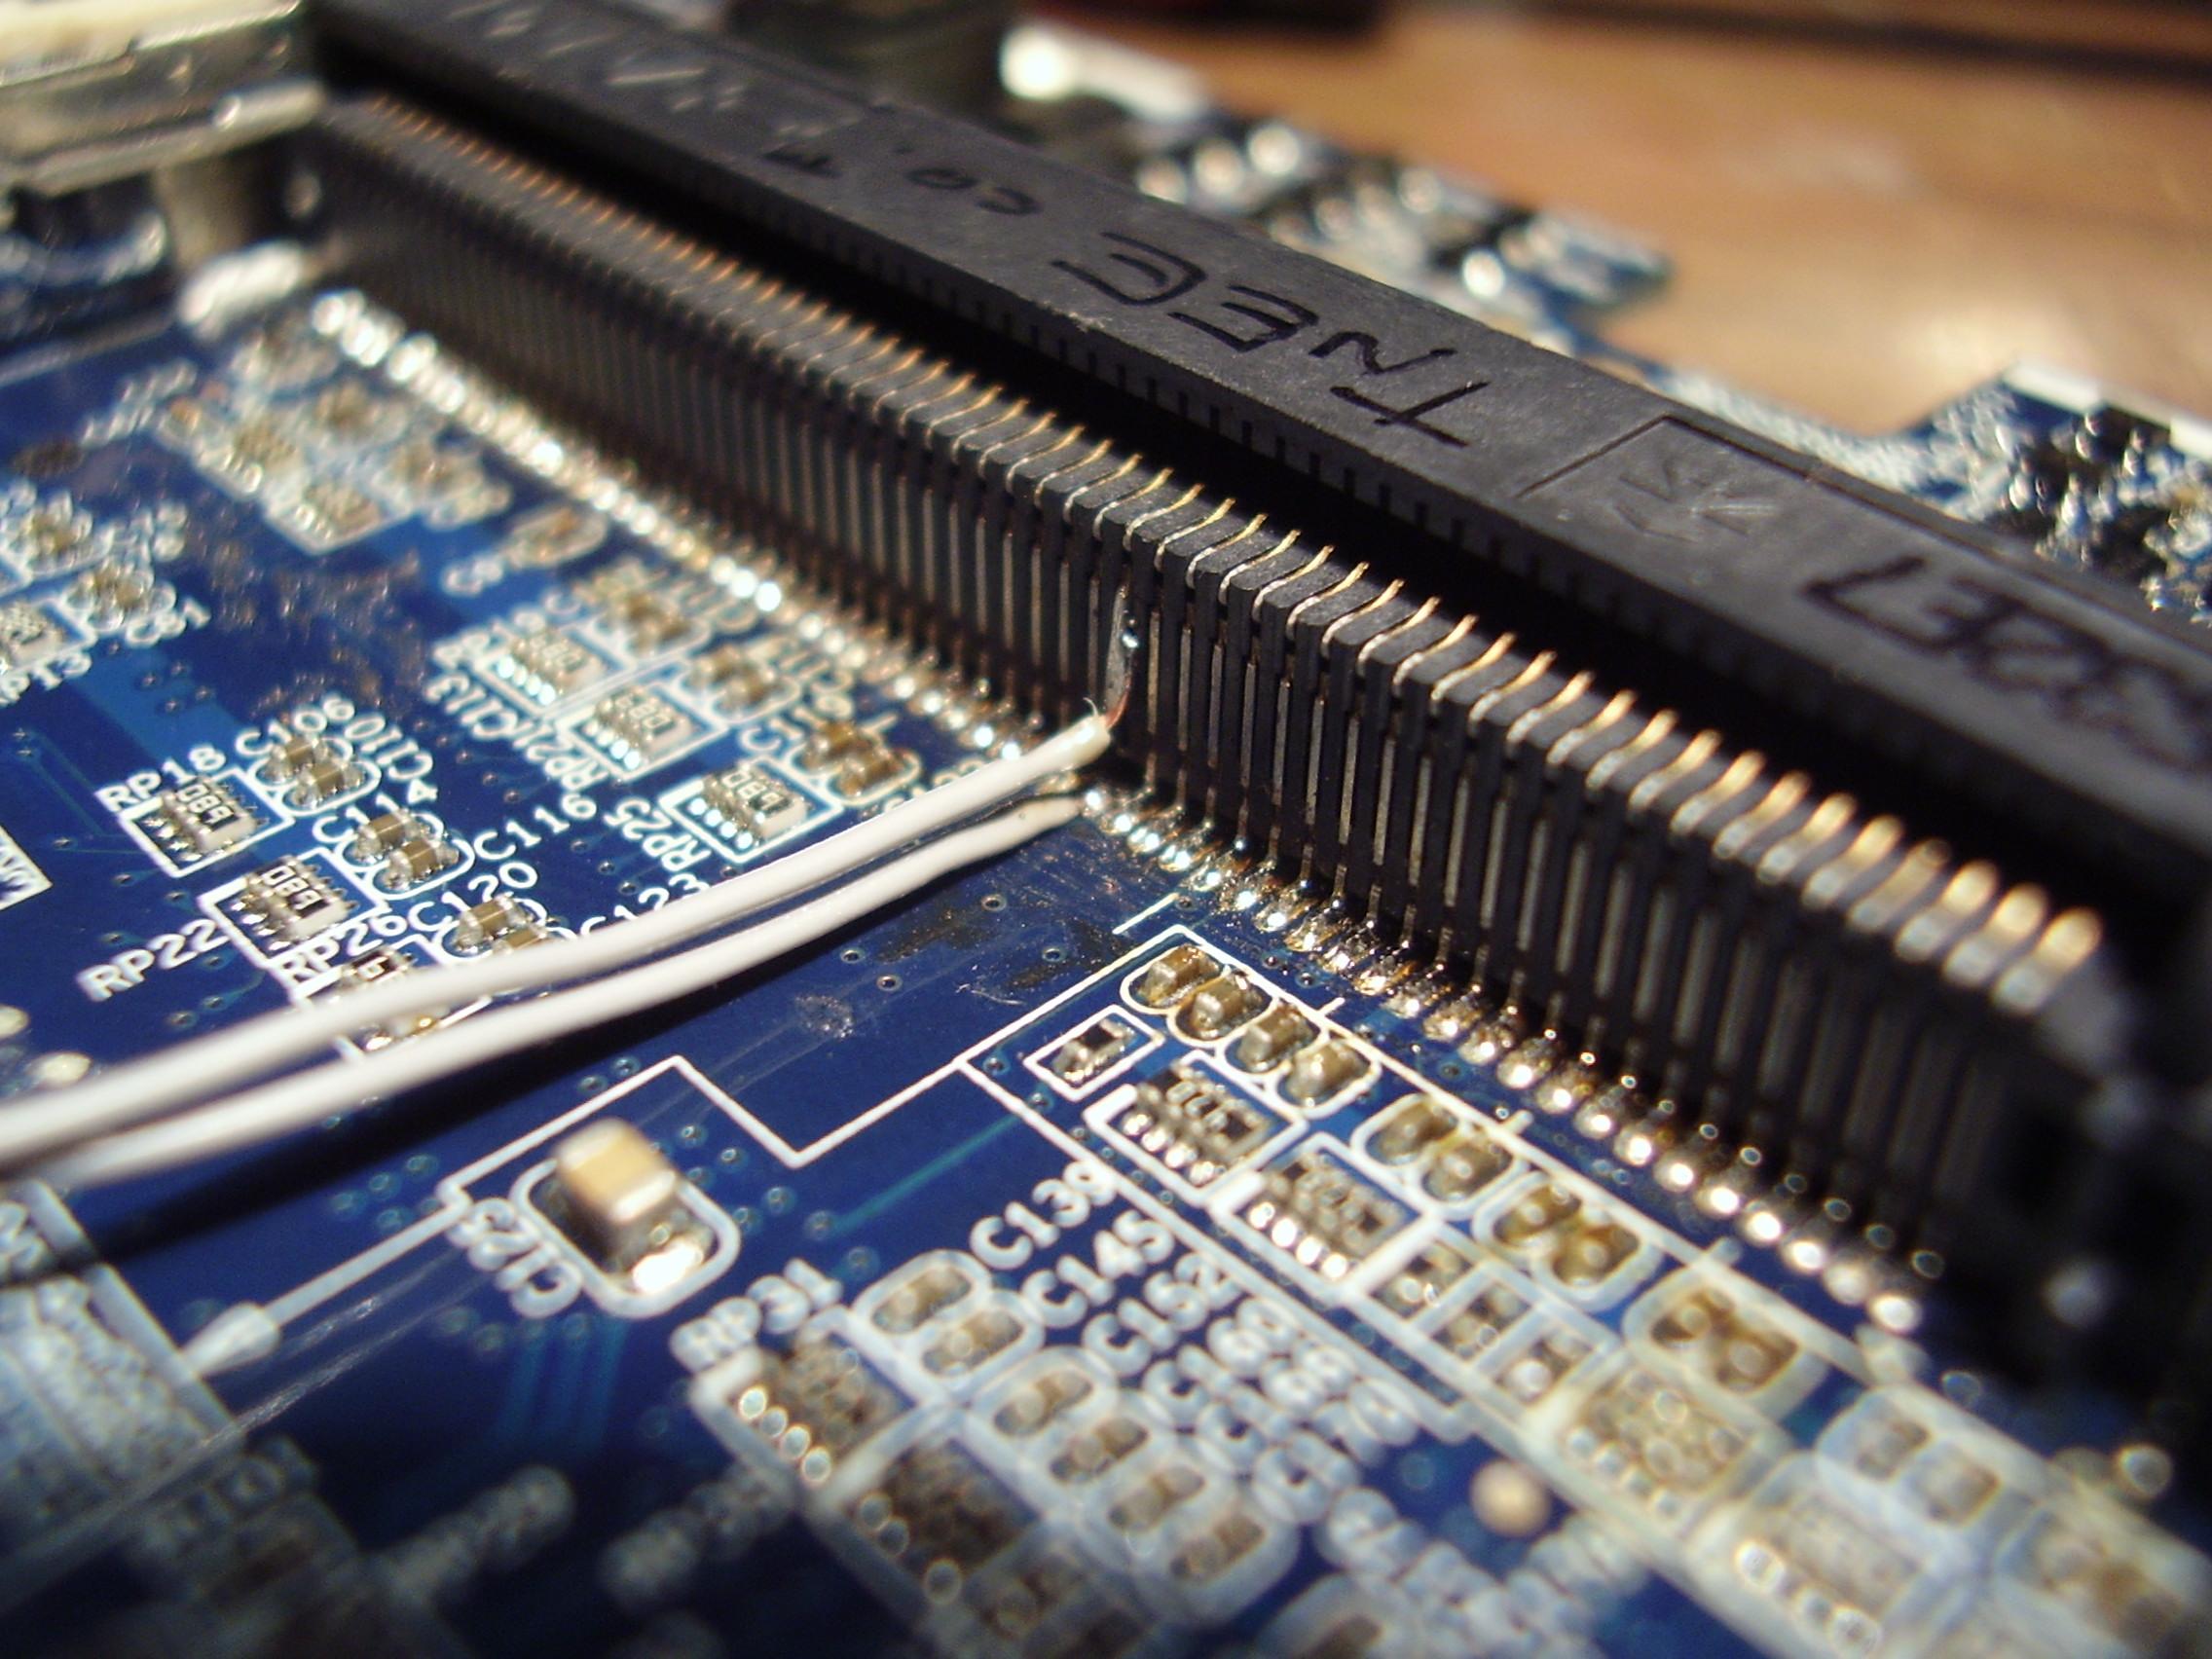
On our board, there was a clearly defined trace running on the solder side of the board from the IDSEL trace to a via. This was as ideal as it gets -- the trace was in plain sight, and fairly decently far away from other traces (no worries about cutting more traces than we expected), and we had two nice size pads to solder our wire to.
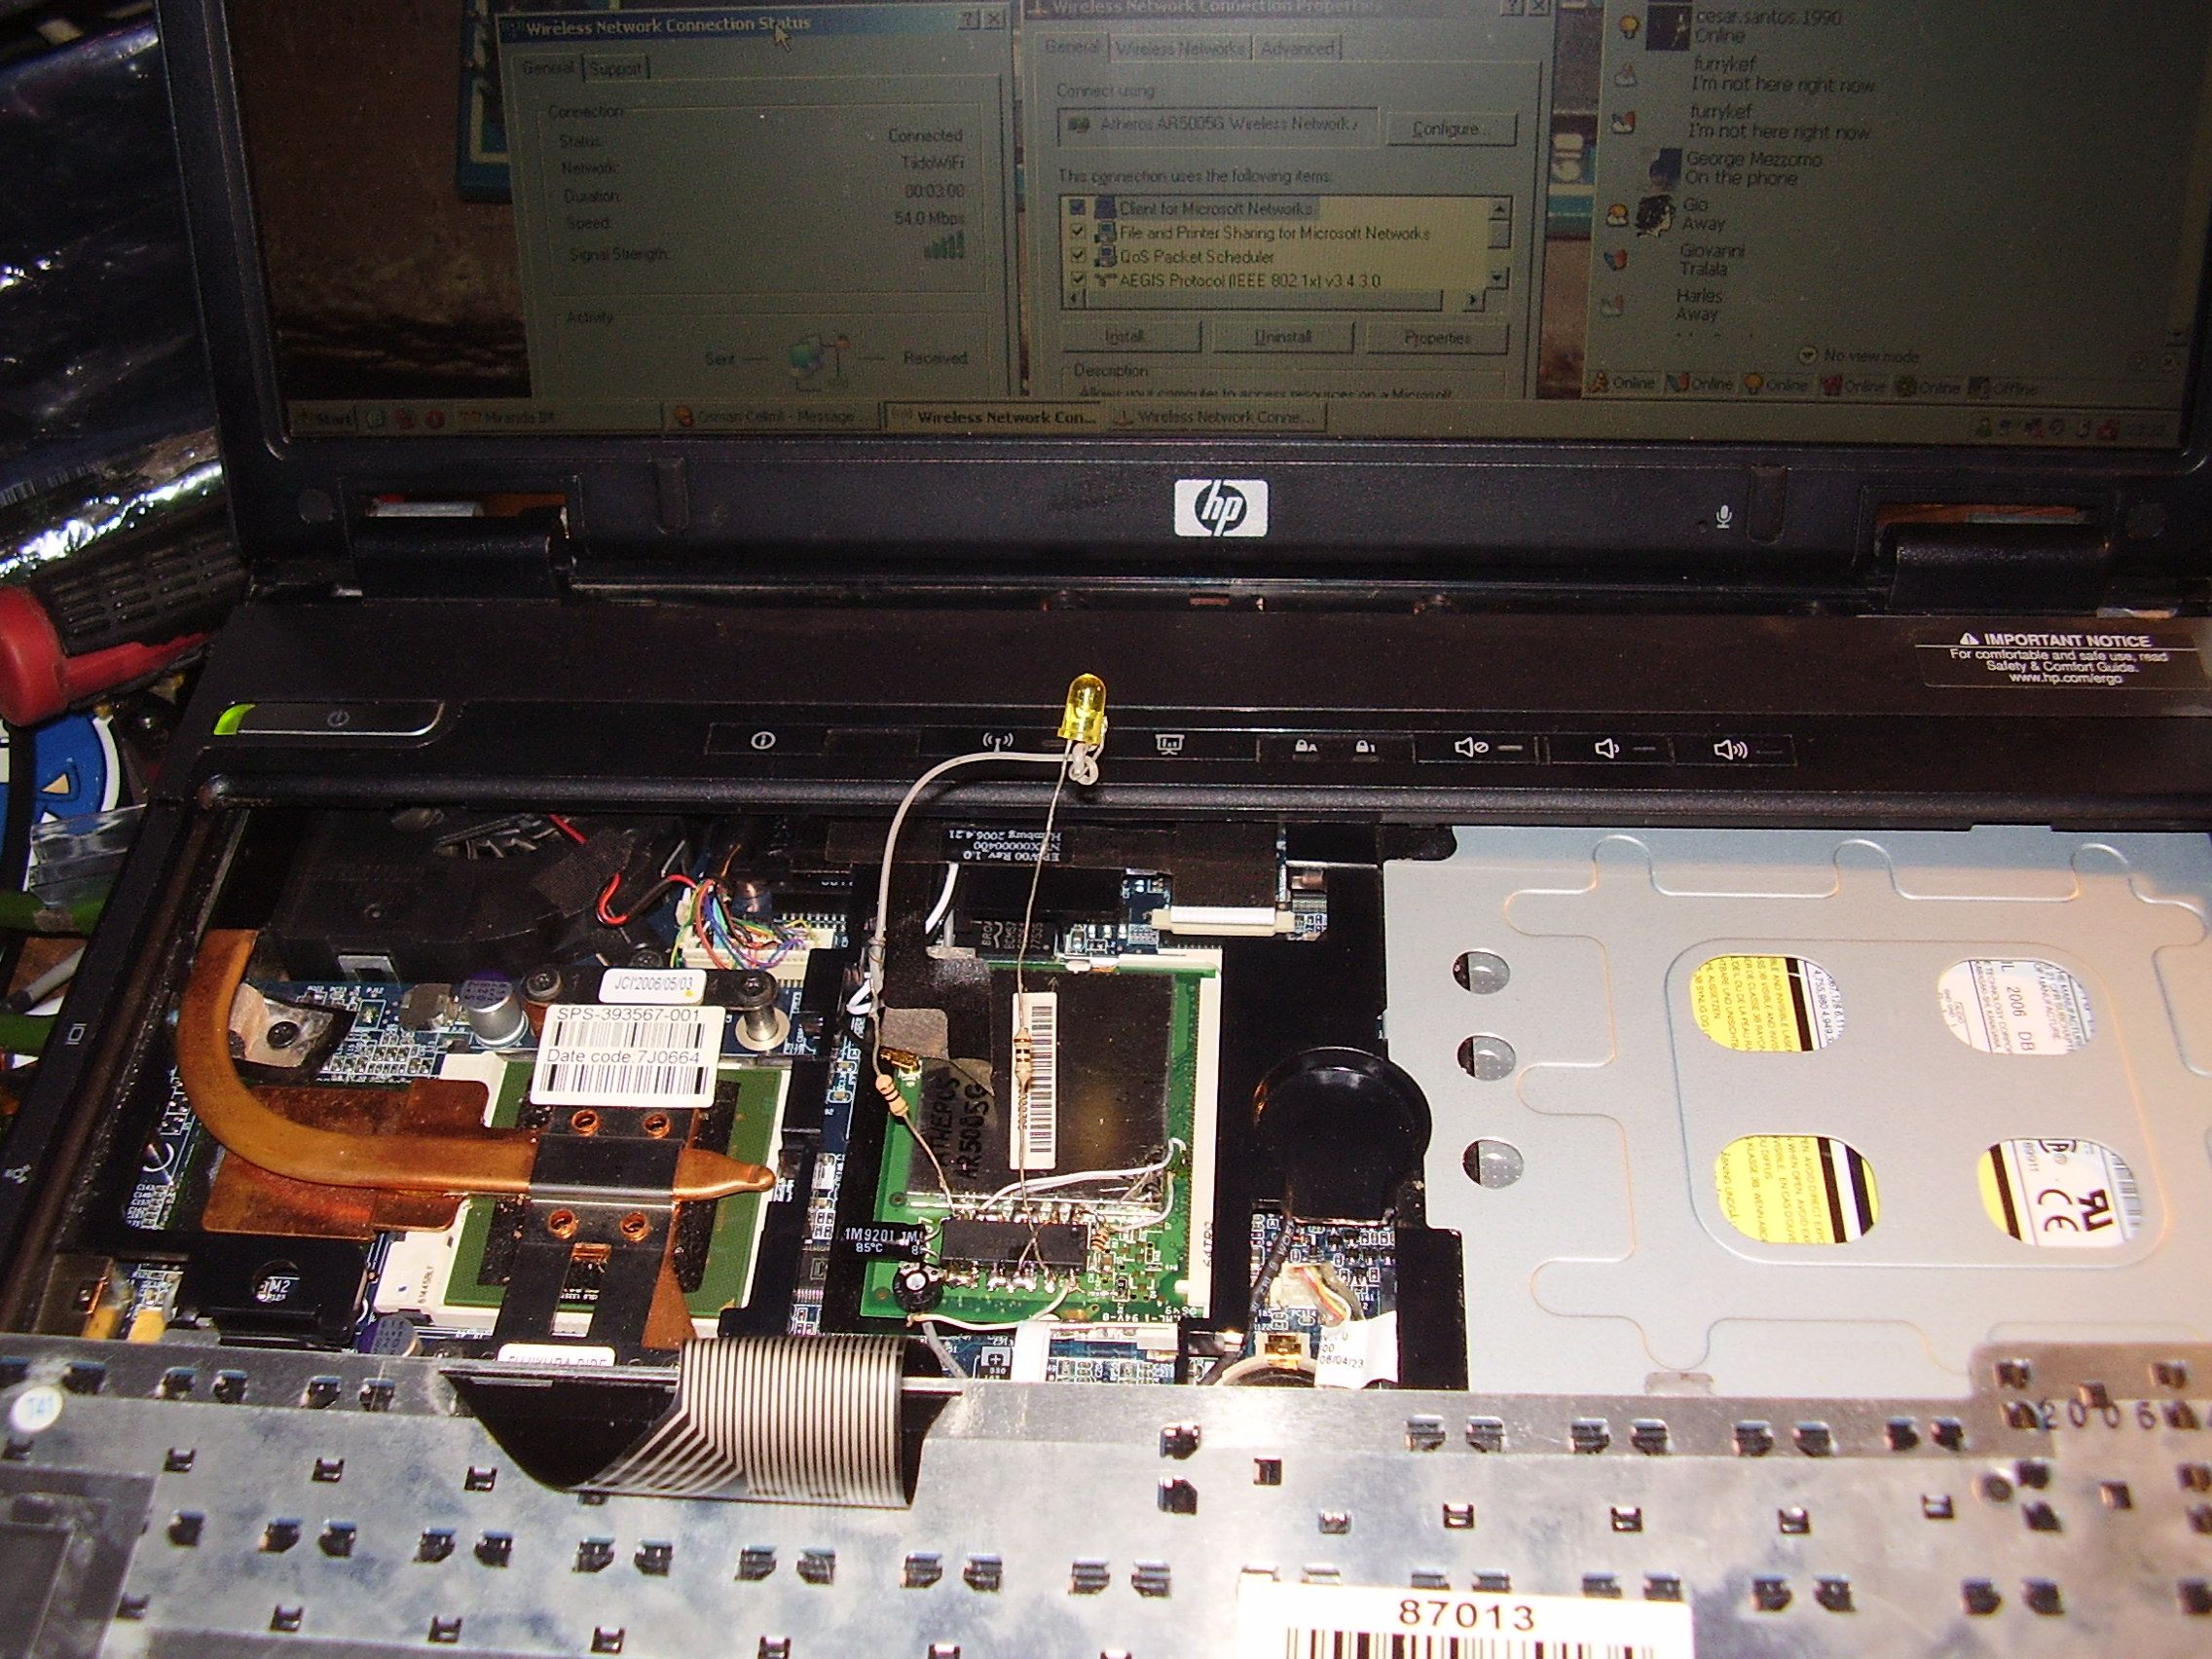
We used an exacto blade that we actuated by hand to cut the trace. It took substantially more force and effort than one might've expected for such a thin line. Still, after a while, we successfully sawed through it. To free up the via to solder to, we put the tip of the knife in the middle and lightly turned it around to remove some of the solder mask. Once enough of a pad was made accessible to solder to, we cut and stripped a piece of 30ga wire, and tacked it down with a SMD soldering tip. We did a similar thing to the physical IDSEL pin on the card-edge connector. Finally, when the connections tested to be proper, we placed a small dot of hot glue on to to keep them in place. On the other ends of the 30ga wire, we soldered on a normally-closed switch, to be depressed on boot time.
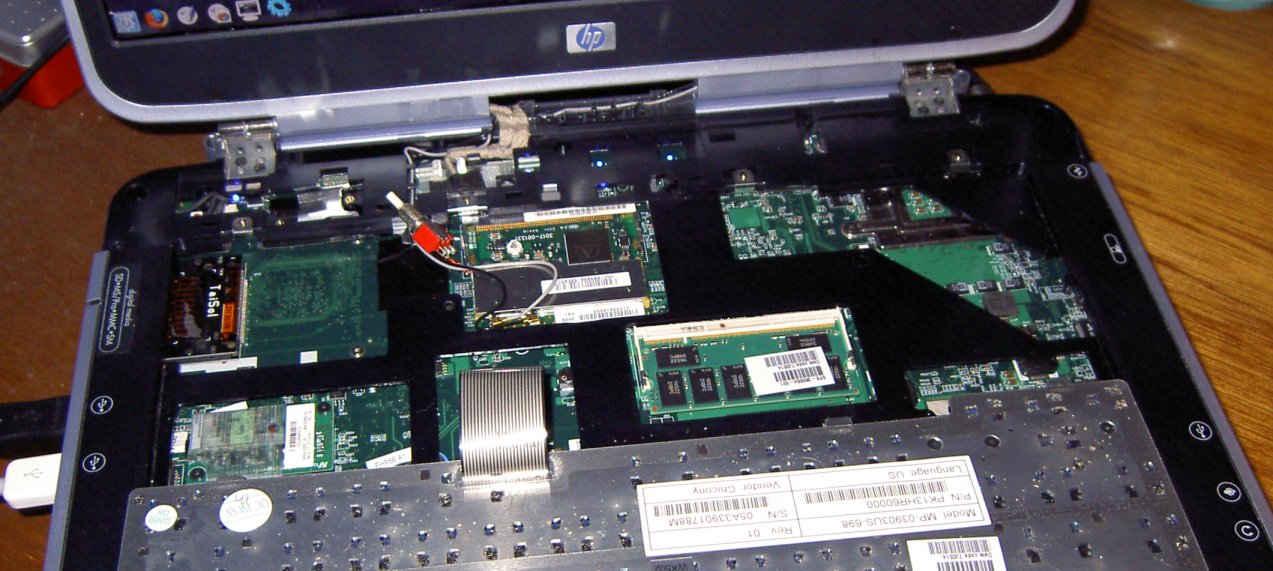
It was then the moment of truth -- time to insert the card. Chris inserted the freshly-modified card into his system and powered it up while holding down the switch. Sure enough, the system booted to a GRUB prompt, at which point he released the switch. GRUB proceeded to load Linux, which happily detected the MADWiFi drivers, associated with a nearby access point, and got an IP address -- mission accomplished.
Future plans
The majority of this experiment was performed over the course of three hours. Our goal was to keep this project as simple as possible for the time being, and add more features later if need be. We anticipate a few problems, however, when we scale this design up.
First, the leads that we used on our implementation were fairly short - on the order of 4 inches each. We anticipate the possibility of signal integrity problems as we increase the length of the leads. The solution to that that comes to mind is to avoid sending the signal through the switch - instead, have the switch control the base on a transistor that diverts IDSEL to ground.
It's still a little unwieldy to need to hold down the switch while booting the system, so one might wish to build an automation module that causes the device to "disappear" for some time on reset. One way to do that might be to use a R-C timer, a buffer, and a diode to sink the signal on power-on until the BIOS has completed running. It should also be noted that the LED pins are different on the official HP cards, so the wireless activity light on the keyboard did not illuminate when the card was in use. Perhaps some more 30ga wire could be used to make the light useful again.
In the end, we shouldn't have needed to go to these measures to upgrade the wireless card in the system. Perhaps the best solution would be not to buy another laptop from a manufacturer that implements such draconian restrictions in their firmware; indeed, that seems like the only way to convince HP to change their policies.
DIY: Don't It Yourself
As we mentioned previously, the traces on the boards are extremely small, as are the pads to solder to. If you aren't intimately familiar with electronic designs, and in particular, soldering, we recommend that you do not attempt this. This procedure could result in the wireless card, the Mini-PCI slot, or the entire machine ceasing to function. We can not take any responsibility for damages that you might incur while attempting this procedure.
Photos
Other Implementations
Tiido Priimägi sent me e-mail to say that he did it too. He, on the other hand, did it with the aforementioned RC timer. He first hacked a card in that way:
He then decided that the next step is generalized it, so he decided to rip the mPCI connector off of his laptop and replace it with a taller one so that he could hide all the circuitry under the card and inside the machine.

Substantial kudos to Tiido for an extremely gutsy rework.